Page 2 of 2
Posted: Thu Aug 06, 2009 7:16 am
by kgbenson
Think about adding a float switch for a larger salt water pool should you ever want one for perlatus. Keeps the specific gravity solid as a rock.
Just brainstorming,
Keith.
Posted: Thu Aug 06, 2009 9:34 pm
by Ryanstein
I tend to simply empty, rinse, and refill the dishes periodically... and Reverse Osmosis water is kind of overkill. Dechlor salt water does just fine for me.

And unless I had 1 or 2+ gallon pools, I wouldn't be too willing to invest in an auto top-off system. I have a portable refractometer my dad gave me when he worked for Cole Parmer (huge distributer of pumps, test equipment, etc). It's really handy, as I can measure precise SG and % dissolved salt in under a minute, and it cleans up just as fast.
I finally worked out a couple of bugs in the circuit today, so all that's left is the humidity sensor (which I will begin designing tonight). But I just realized today that for technical reasons I will not go into, the humidistat requires a completely different circuit than the thermostats do. So there will be two humidity and 5 temperature sensor inputs, and one input for pH. As well, 2 thermostats and one humidistat, which get their readings from the above mentioned sensors.
I'll update tomorrow if all is well.
~Ryan
Posted: Fri Aug 07, 2009 10:52 pm
by Ryanstein
I made some progress with the humidity sensor circuitry today (to the the tune of a page of math and formulas to design it

)... It gives a reading proportional to humidity, but the scale is way off. At 70% RH, it reads below 50%. But oh well. There's always tomorrow.

Posted: Mon Aug 10, 2009 8:29 pm
by Ryanstein

I got the humidity sensor measurement working today!! It's accurate to about 3%, and incredibly stable.
Now all I have to do is add it to the rest of the circuit, then construction begins!!
~Ryan
Posted: Fri Aug 14, 2009 1:58 am
by Lynx
Color me intrigued! You're one smart cookie, Ryanstein. :D
Will be reading with interest to see what transpires with this project.
Posted: Fri Aug 14, 2009 11:51 am
by Ryanstein
Thanks

Big MaC wrote: If you could get something to test water, and sand temps that would be REALLY cool too.
It can test water pH, and the temperature probes will be molded likely either in silicone or epoxy, and possibly within a nickel tube (it won't rust or corrode so is not dangerous to any form of wildlife, so could easily test sand temperature). The temperature probes will also be completely water resistant, and the humidity sensors have a built-in micro dust filter which protects them from dust and sand particles.
I borrowed a precision Dremel tool from a friend which has very small grinder bits. So I've cut the circuit boards to size and have drilled the holes for the probes.
Grammarcia- you needn't worry about it harming the crabs.
I've spent months designing and testing the circuitry to ensure it's 100% safe for use on any animal (specifically crabs). As long as it isn't misused, i.e. repeatedly dropping it on the floor, it should work reliably for years with occasional calibration.
~Ryan
Posted: Sun Aug 16, 2009 10:04 pm
by Ryanstein
Sorry I haven't been here for the last couple days... I went to a friend's cottage last night.
A scaled-down version with a few temperature and humidity probes would be 100-200$, whereas the full unit I've been building has 8 sensor inputs (including one for pH) and 3 thermostats/humidistats, and would be in the several hundred dollar range. Though this may seem expensive, keep in mind that I've dedicated numerous hours to the project, and the accuracy is far higher (and stable long term) then most other reptile gauges at the pet store.
Big MaC: If you would actually like a controller for your tank upgrade next summer, then you could send me a PM or email. I would be happy to build you a custom controller to meet your needs, and you could decide how many temperature/humidity probes and thermostats/humidistats you want, and if you want to test pH or salinity, etc. and we could negotiate a price.
~Ryan
Posted: Mon Aug 31, 2009 9:02 pm
by Ryanstein
I kind of performed some surgery on my circuit the other day, so setting the thermostat is more user friendly now (and uses less buttons).
I've used a bi-colour LED (a red and a green LED both encased in a single package) for power; it lights up green when the controller is running normally, red when all the displays are shut off (at night no one wants leds glaring at them in the face

), and orange when setting the thermostat.
I finished cutting the circuit boards and most of the casework (drilling all the holes for the enclosure), and started assembling the circuit board today after deciding on a layout.
Here's some pics of the actual case, with one of the circuit boards cut to fit (there will be two stacked on top of one another):
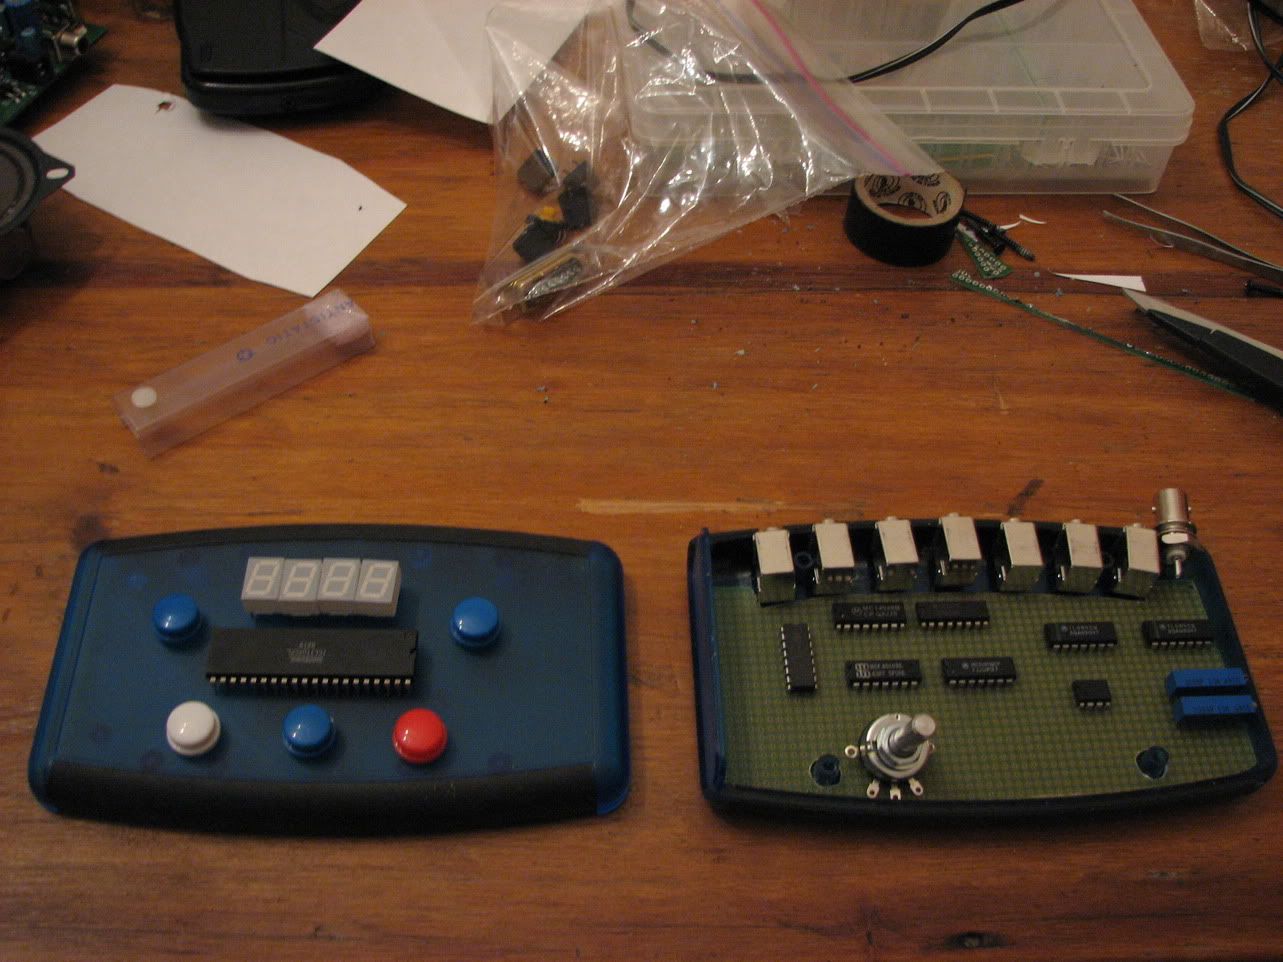
The one on the left is the top of the case; the parts sitting on top were just to see where they would go inside. On the left is the inside of the case, with the "motherboard" circuit board where most of the processing goes on. The grey rectangles at the top are the plugs (actually headphone jacks) that connect to the various sensors. I'm still deciding on the exact layout for the bottom layer...
And here's the humidity sensor, now mounted on its on (tiny 1 inch long) circuit board:
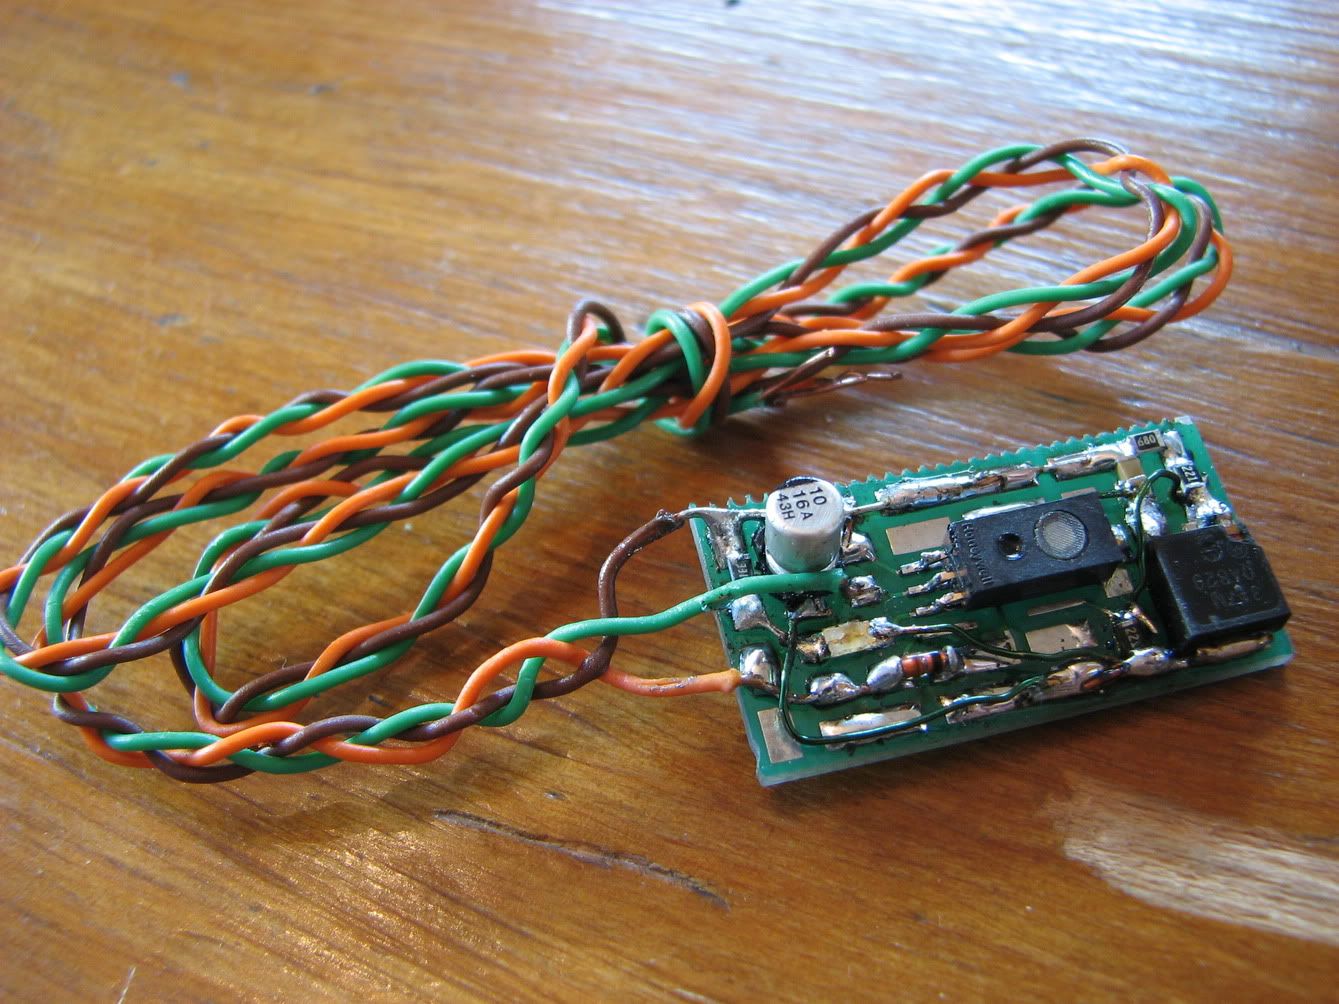
The parts beside it are the humidity sensor's power supply and protection circuit.
I've started soldering all the parts to the boards, so it won't be long now.
Ryan