Dual plastic tote crabitat set up

Older topics that are in the process of being sorted and moved into the appropriate Archived sections below.
Locked

Topic author
fantasybookworm
Posts: 474
Joined: Wed Apr 22, 2015 8:59 am

Dual plastic tote crabitat set up

Post by fantasybookworm » Thu May 21, 2015 5:38 pm

I decided to start a thread to keep updated as I work on modifying & setting up the plastic totes that I'm going to make into a crabitat! :) I hope this is okay. I thought it might help show people that the plastic tote thing can work well too, and how I modify them (and what I learn from trial & error, or from the advice of others on here). I know there's the tote how-to in the DIY forum, but couldn't find much else about tote crabitats on here.

So this is just the intro post, I haven't begun modifying the totes yet. But these are the ones I have.

Image

They are 32 1/8" long, 19 1/8" wide, and 13 1/4" tall. I have four of them because I plan on cutting the top rim off two, then cutting the bottoms off the other two, and attaching them to make the overall set up taller, so I can add more substrate & still have room for climbing things & second levels. I also plan on attaching them with 4" wide PVC pipe so the crabs can go from one side to the other. I decided on this set up partly because it'll give the crabs a little more space than with my 45-gal tank, and partly because it'll be much easier for me to move once it's broken down & sub is removed. Since I plan on moving at least once in the next year (and probably more than that), this will be very helpful!

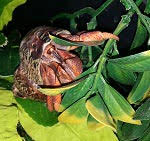
I do have water pools so far, but I'm currently undecided on which to use & whether to keep the plastic tubs if I don't use them right now for pools.

Image

I would use the stone-like bowls in a heartbeat, except for one concern.

Image

That's a rubber plug, to allow for draining if necessary, I believe. The bowls are meant to be used as planters or something. I haven't tested yet to see how watertight the plug is, but I'm guessing even if it seems to hold, I should take some extra precautions to avoid having water leak out & flood the bottom of the crabitat. Does anyone have any suggestions on what I can do to seal that better? Or will it be too difficult to do so & still open to leaking? I would rather use these bowls for my pools, but if it'll be a potential hazard, I can easily use them for shell shops/moss pits/hides instead.

I hope to be able to start modifying the totes sometime next week as I have a lot of free time! So I'll try to update this thread as I go. :)

User avatar

megmaholm
Posts: 1247
Joined: Wed Jul 16, 2014 8:15 pm
Location: Bloomington, IN

Re: Dual plastic tote crabitat set up

Post by megmaholm » Thu May 21, 2015 9:03 pm

You can probably use aquarium silicone to seal the stone bowls. Once it cures it's crab safe. They look awesome! I'm looking forward to more pics as you progress.l with the setup.
Crabbing since July 2014! 75 gallon with 12 Purple Pinchers.

User avatar

aussieJJDude
Administrator
Administrator
Posts: 4999
Joined: Fri Feb 24, 2012 8:12 pm
Location: Melbourne, Australia
Contact:

Re: Dual plastic tote crabitat set up

Post by aussieJJDude » Thu May 21, 2015 9:31 pm

Or place the bowls in tubs and fill the tubs with gravel so they can have a rocky beach to "dry off" on and to remove some of the sand from the crabs before they enter the bowls...

I so excited for you, your plans sound so amazing and awesome! Look forward to seeing all those pics on the updates (*hint* *hint*)
|| Avid Aquarist Addict (2007) || Crazy Crabbing Connoisseur (2012) || Amateur Aroid Admirer (2014) ||

"She’s there, she’s upright, and she’s wigged" ~ Trixie
Infrequently on due to studies


Topic author
fantasybookworm
Posts: 474
Joined: Wed Apr 22, 2015 8:59 am

Re: Dual plastic tote crabitat set up

Post by fantasybookworm » Thu May 21, 2015 9:58 pm

Hm...I like both of those ideas! I'll have to see if I would be able to find a big enough tub & also see if it would fit without taking up too much floor space in the totes, but I may give both things a try. I'll definitely do the aquarium silicone, at least. I guess I'll get some of that ordered tonight so that I'll get it soon & they'll have time to cure. I'm also considering taking another look at the posts about false bottoms to see if I can set one up in these totes before I fill them with sub. That would make me feel a lot better too.

Thank you both! :D I'm super excited to get things set up. It'll be so much nicer to be able to take my time now & really have things arranged how I want them without worrying about scaring little crabbies. And I"ll definitely be including lots of pictures, Aussie! :lol:


Topic author
fantasybookworm
Posts: 474
Joined: Wed Apr 22, 2015 8:59 am

Re: Dual plastic tote crabitat set up

Post by fantasybookworm » Fri May 29, 2015 6:59 pm

Work has yet to begin on the totes...But I think I may be able to find a time that my dad & I are both free next week so we can get started cutting. I need his help cutting the tops/bottoms off the different totes so I can fit them together. I also want his help cutting a hole in each for the PVC pipe connector. I need to do some research tonight on how we can cut the tops & bottoms off without cracking the plastic. I know I've previously read heat will help, I'm just not sure the best way for us to go about implementing that.

In the meantime, I bought (most of) the stuff I need for the false bottoms!

Image

I need to go back to the store & get another sheet of egg crate, this one won't be big enough for both totes. But I'll have plenty of landscape fabric to cover the egg crate, I have PVC connectors to serve as the supports, and I have plastic canvas to cover the landscape fabric. I also got the PVC pipe to use for connecting the two totes.

I'll make sure I take pictures as I put together the false bottoms as well, so I can post those here. :)


Topic author
fantasybookworm
Posts: 474
Joined: Wed Apr 22, 2015 8:59 am

Re: Dual plastic tote crabitat set up

Post by fantasybookworm » Sat Jun 06, 2015 10:16 am

Finally have an update for this!! I have the totes almost done. :D All I have left to do is

- cover the seam where they meet with styrofoam insulation & tape
- drill holes in the sides for attaching things to
- drill holes in the top for ventilation
- build the false bottoms
- fill with sub & decorate (which won't be done for a month, when I finish moving to my new place)

I also need to see about ordering Ultratherms for each tote, but I think that's the only thing I have left to buy, other than maybe a new UVB light (which may wait until I'm settled into new place & can afford it, since it's not strictly necessary).

Here are the pictures!

Image

Image

Wodesorel suggested I try using cork bark for the corner that had a huge gap due to the tote bottoms being smaller than the tops. It worked wonderfully!

Image

I'm more or less happy with how this turned out so far. I wish it looked nicer & I would definitely change things if I tried it a second time, and would recommend keeping these things in mind if anyone else tries this:

- Try to get bigger totes to use for the top level. Most totes, even if they're relatively straight-looking, tilt inwards as they go from top to bottom. That means the bottom's going to be smaller, so if you get the same size tote for top & bottom (like I did), they won't fit & you'll have a gap. If you don't mind looking weird, take a tape measure to the store so you can measure tops & bottoms of totes to see which ones would make the best fit. My original plan was to have the top tote fit over the bottom one, but there was no way that was going to work.

- The ziptie method worked great! I would definitely suggest it to anyone else wanting to attach totes like this.

- Be more thorough about measuring than I was. :lol: My PVC pipe that attaches the two totes isn't exactly stable because it doesn't line up exactly. It does stay in place, but if the totes are bumped too much, they can separate. I expect that will be less of an issue once I have 100lbs or so of substrate in each tote, but I will probably add packing tape and/or duct tape around each joining when I get to my new place in a month & set it back up, just to be safe.

- My dad used some kind of small saw thing to cut the bottom totes, after I'd already done the top ones. It worked perfectly & didn't cause any cracking. Because we didn't have a big enough hole saw bit for the PVC pipe, we used that for the holes for that too & it worked very well. I'll get the name of the tool from him later so I can add it to this. I wish we'd tried it earlier - I used a utility knife (plus hair dryer to heat the tough spots, like the corners) to cut the top totes & part of the bottom ones, and while it worked okay, it was very uneven & we cracked one of the totes in the corner due to pushing too hard. If you use a utility knife or anything like that, go slow & steady & try not to force it too much, especially in the corners. Be careful with a drill for holes too - I caused a couple small cracks (nothing too bad at all) by pushing too hard.

I think that's it for now, if I remember any other tips or issues later, I'll add them in. :)

User avatar

Asheka
Posts: 742
Joined: Tue Mar 10, 2015 9:42 pm
Location: Kingston Ontario
Contact:

Re: Dual plastic tote crabitat set up

Post by Asheka » Sat Jun 06, 2015 5:01 pm

Looking spiffy! You could try to find a way to wrap the corners to cover some of the "less appealing" spots maybe, like aquarium backgrounds or something? I think it's looking awesome either way.
4 cats. 1 Dwarf African Frog. 1 amazing fiance. Four PPs; Peeta, Finnick, Katniss, and Rue.
Don't Hate What You Don't Understand PRIDE!
http://crabtaztic.blogspot.ca
Turning the gross and scary cute and merry at PlayfulDead Creationz

User avatar

aussieJJDude
Administrator
Administrator
Posts: 4999
Joined: Fri Feb 24, 2012 8:12 pm
Location: Melbourne, Australia
Contact:

Re: Dual plastic tote crabitat set up

Post by aussieJJDude » Sun Jun 07, 2015 6:52 am

Just another food for thought (which I thought that you were going to do :) ) is take the lid of the bottom tote; cut out the inside (like having a lip around the edges around 2 - 5 inch) and place the other one on top (after cutting up the bottom). If needed, zip tie the top to the lid and if you need to get inside you have "two" vantage points. At the top of the topper and at the top of the substrate bin. :lol:
If that makes sence?

But still, this tank still rocks! I am loving it! :) Keep the pics coming once it getting set up, every little detail!
|| Avid Aquarist Addict (2007) || Crazy Crabbing Connoisseur (2012) || Amateur Aroid Admirer (2014) ||

"She’s there, she’s upright, and she’s wigged" ~ Trixie
Infrequently on due to studies


Topic author
fantasybookworm
Posts: 474
Joined: Wed Apr 22, 2015 8:59 am

Re: Dual plastic tote crabitat set up

Post by fantasybookworm » Sun Jun 07, 2015 1:01 pm

It took me a few reads, but I get what you mean! :lol: That would be really neat too, and I think it would also work well! Someone should give that method a try sometime. And thank you both for the comments! I'll definitely take more pictures once I get more done on it. I'll probably do the styrofoam insulation & cut the egg crate for the false bottoms before I leave, but other than that will probably wait to finish everything once I get settled in my new place next month. So it may be a while before more updates. :)

Asheka, thanks for the suggestion! I'm probably going to be covering the seam where the two totes are ziptied together with styrofoam all the way around anyway, so I'll probably put something better looking over that once it's taped on. I have fancy duct tape, so maybe I'll use some to cover it. :D Or maybe I can print of some Lord of the Rings themed artwork to tape over the styrofoam...hmm. I'll have to think about it!

Locked