
We've more or less finalized plans. What I'm waiting on right now is locating two used 70 or 75 gallon tanks. The local reptile rescue sells donated tanks that size for around $50 dollars. They should have one they're holding for me, and we're just waiting on the second to make the drive up there (about a 3 hour round trip) to collect them. They might even bring them down for us during the adoption event.
I kept thinking and thinking about how we were going to do a tank that is 5 feet long safely. Our house is old (built 1906) and the floors are very uneven. I've already got some water damage coming through the outside of the Display Case - I won't be able to check until I tear it apart, but I'm pretty sure it's due to cracking of the epoxy coat at the bottom seam where the base meets the sides.
So, epoxy became my last choice, since I need this build to be permanent. Also, I wasn't sure how much I would need - I have a gallon of the epoxy I purchased a couple years ago that should still be good, but at nearly $100 a gallon plus good quality plywood to construct the base - there was a good possibility it could have blown the budget on just the base.
I was playing with the ideas of using some sort of liner. It wouldn't crack, and any unevenness wouldn't matter since it has so much give to it. I could have used a cheaper plywood as well since it wouldn't matter if the surface had imperfections. However, a liner that is thick enough to possibly withstand hermit crab claws - since it would have been an untested theory I was going with something that was turtle safe - is ridiculously expensive. Half the budget would have gone to the liner alone, not including the plywood to contain it.
So, ultimately, we decided on the used tank idea. Two 70 gallons placed side by side (or 75 or 90 gallons, but it looks like 70's are the most common one they get) for around $100 total plus the gas to get there and back - and it's a donation to a good cause in the process. We can put them on a 4x4 base to get them to the right height, and then use a very thin decorative plywood (possibly bead board! I love that look and it's very inexpensive) to hide the frankenstein-ness of the build and the wiring. Ideally I wouldn't need to hide it, but I don't really want the cats to try to squeeze under the tank so covering it all up is going to be necessary.
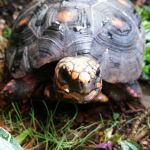
If you did the math, that leaves a foot on the end unaccounted for. I have a 20 gallon turtle tank (one short side goes halfway up) that I have been wanting to put in as a brackish pool. I had been trying to figure out how to anchor that weight, but this way I can make a platform (either epoxy coated with sand or possibly tiled with natural stone) and it'll be solid without having to worry about the crabs digging under it or it collapsing/cracking.
Once we get the tanks we can get measurements to finalize the upper build using dimensional lumber to frame the windows. The front and back will be aluminium rimmed picture storm windows measuring 60 inches long by 40 inches high. ($5 each at the Restore, and I bought 2 spares just in case.) The side glass will be a pair of wood framed 47 inches high and 16 inches wide storm windows on either side ($2 each with 2 extras) that are hinged so they swing open for easy access. The support for the windows and for the canopy where the lights and humidifier will be hidden will be run up the corner on either side to make up the difference in width between the tanks (36 inches) and the windows (32 inches)
Windows! We got those back in September.

I figure the inside we'll fill up using the stack of branches from the tree we had taken off the house last year. The tank will be see-through in the space between the kitchen and dining room, so no backgrounds needed. I've got the branches piled up against the shed. We can cut more branches as needed from my MIL's property. There's an ash that's been infected with borers that has to come down anyway.
For heating/lighting/humidity I'd like to have everything contained in the canopy. Right now the idea for the canopy is two ceramic heat emitters on dimmers, some florescent tube lights (we have an old x-ray board in our garage we can hopefully scavenge for ballasts, tombstones and wiring), one small fan that blows over the heat emitters to circulate the heat and humidity, and on the far end a bit plastic container with a fogger inside. I'd also like to somehow incorporate fans and/or vents into either end for summer to keep the tank from overheating. The florescent lights would be on a timer to run 12 hours a day, and the fogger would be on a different timer to run for a half-hour two or four times a day. That would probably need to be adjusted depending on the season. All of this would be protected from the crabs by white eggcrate lighting diffusers.
The very first step though will be putting in 4x4 support posts in the basement directly under where the tank is going. This much weight on these old floors is a recipe for disaster. The other bummer is that the joists are running the wrong way for this project - instead of being perpendicular and spreading the weight out over many, it's running parallel so it'll be on three joists only, in the middle of the expanse, where the walls and joists have already been messed with. Three support columns, and then I'll feel better knowing it's not going to cave in the floor. The 4x4s are not that expensive (around $5 each) and we'll need four total. I had wanted to put the build in the living room, but the only wall big enough would have put the support columns right in the middle of the laundry room door downstairs. It would have been barely passable, but it would have been a pain to live with.
Edited to add: I'm having hubby put this all on it's own GFCI breaker. I'm a little worried about using the existing wiring and it's going to be extremely simple and not cost too much more to add a breaker and run a dedicated line for just the tank.
So... yeah. Just have to start collecting everything.